|
|
|
Information
- The Good Guys
- The Bad Guys
- Other Characters
- FAQ
- Cast and Credits
- Official Press
- Tour the Pond - Episode Guide
- Did You Know?
Multimedia
- Offical Pics
- Coloring Book
- Screengrabs
- Original Art
- How to Draw...
- Fan Gallery - Sounds
- Video
- Music Videos - Songs
Fanfiction
- The Dragon Chronicles
- Chronicles Characters
- Fan Archive - Fan
Characters
- Other Fandoms
Drake 1 - Desktop Icons - AIM Icons - Wallpaper - Soundscheme - Winamp Skin
Links - Links - International Links - Webrings
Extras - Forum - Sign Guestbook - Read Guestbook - E-mail Zelda - Save the Ducks - Timeline - Zelda's Rants
Copyright � 2002
Zelda

Shading and Texture
After you've completed a good drawing and erased all of your lines from your rough sketching, what you're left with is essentially a black and white frame. Even with muscle and skin details, the drawing still looks pretty hollow and dimensionless. This is the point where I stop with most of my drawings, but by no means is it the proper place to call it a day. A little shading and texturing of your drawings will bring a massive amount of dimension and realism to an otherwise empty line drawing. Below are a few simple techniques that aren't too difficult to master.
Shadows- Shadowing helps to establish your character in a dimensional space. Add a shadow, and suddenly the viewer becomes aware of the fact that your character is standing, flying, or floating, and which direction the light is coming from. Shadows also impart an excellent stylistic element. Your entire character can exist in shadow as a silhouette. The heavy use of black makes a very dynamic statement, but shading can also be done in color. The simplest type of shading starts with determining where the light is coming from in your picture. Is it a harsh lamp or a gentle sunset? Take that light direction and project it onto your character, and the rest is pretty simple. Make sure to remember that the lower your light source is to the horizon, the longer the resulting shadow will stretch. If you're using pencil or crayon, use the blunt flank of the lead, and not the tip of the point, to shade. To blend a graphite or charcoal pencil, simply rub with a tissue or your finger.
Hatching/Cross-hatching- This technique is what it sounds like, basically taking the tip of your pencil, pen, or brush, and creating a screen of lines. Cross-hatch lines usually stretch diagonally rather than horizontally and vertically. Hatched lines never intersect each other. Hatching is a great effect to use on hair and other keratinous surfaces, such as horns and beaks. Cross-hatching is a quick way to add the appearance of scales or scratches to your characters. The spacing of the lines helps to determine the subtlety of the effect.
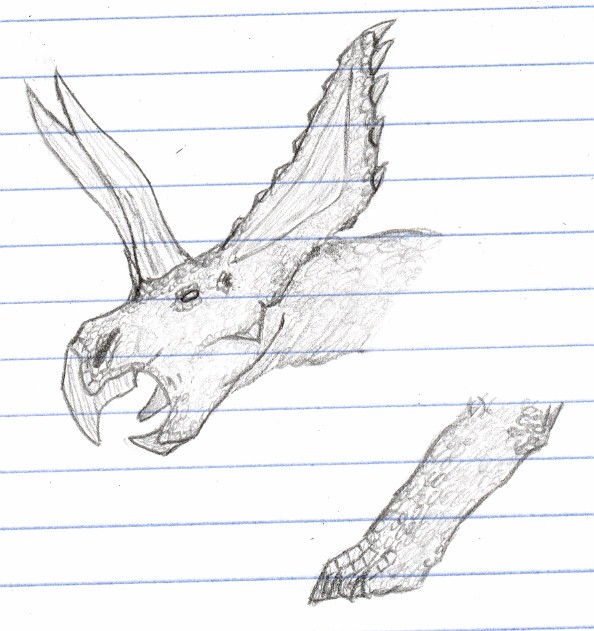
Bubbling- drawing swirls or circles is another textural effect. Depending on how tightly packed they are, they can look like scales or curly hair. Above is a sketch of a ceratopsian dinosaur, notice how certain facial and pedal scales are well defined, but the rest of the form is textured in with quick bubbling swirls.